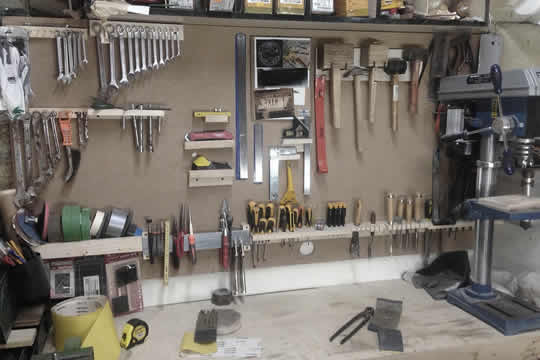
Creating a Tool Wall in a Shed
A shed is a great place to store things, but if you want to organize it efficiently, creating a tool wall in the shed is a great way to keep tools stored neatly.
Once your storage shed is built, the chances are you have at least one free wall in the shed to erect a pegboard, hooks and some shelves.
Here is an easy-to-follow, step by step guide on creating a handy tool wall in your shed.
Creating a Tool Wall: A Step-by-Step Guide
 Are you looking for a way to organize your tools and make them easily accessible?
A tool wall is the perfect solution for organizing your shed! With a tool wall, you can keep your tools organized and easily find what you need when you need it.
Here's a step-by-step guide to creating your own tool wall.
Step 1: Choose a Wall
The first step is to choose the wall you want to use for your tool wall.
Make sure you choose a wall that is sturdy and can hold the weight of your tools. You may want to consider using a wall in your garage or workshop that is firmly braced.
Step 2: Gather Your Tools
Now it's time to gather all of your tools together that you intend to store on the wall.
Make sure you have all of the tools you need for your tool wall. This includes hammers, screwdrivers, wrenches, pliers, and any other tools you may need.
Step 3: Install the Pegboard
Once you've gathered all of your tools, it's time to install the pegboard.
Start by measuring the wall and cutting the pegboard to size. Then, use screws to attach the pegboard to the wall. Make sure you use heavy-duty screws to ensure the pegboard is securely attached to the wall.
Step 4: Hang Your Tools
Now it's time to hang your tools in the places you have designated for them.
You can use hooks to hang your tools from the pegboard. Make sure you use heavy-duty hooks to ensure they don't come loose and fall on your head.
Step 5: Organize Your Tools
The last step is to organize your tools to make it easy to find the right tool when you need it.
You can use labels to help you keep track of where each tool is located. This will make it easier to find the tools you need when you need them.
Why Creating a Tool Wall is a Great Idea
Creating a tool wall in your garden shed is a great way to keep your tools organized and easily accessible.
Not only will it make it easier to find the tools you need, but it will also help to keep your shed neat and tidy.
A tool wall can be created using a variety of materials, such as pegboard, plywood, or even a simple sheet of metal. You can also use a variety of hooks, bins, and shelves to store and organize your tools.
When creating a tool wall, it's important to consider the size and shape of your shed. You'll want to make sure that the wall is large enough to accommodate all of your tools, but not so large that it takes up too much space.
You'll also want to make sure that the wall is securely attached to the walls of the shed, so that it won't move or shift when you're using your tools.
Organizing Your Tools
Once you've decided on the size and shape of your tool wall, you can start to think about how you'll organize your tools.
You can use hooks to hang larger tools, such as shovels and rakes, while shelves can be used to store smaller items, such as screws and nails. You can also use bins to store items such as gloves and safety goggles.
Creating a tool wall in your garden shed is a great way to keep your tools organized and easily accessible.
Summary
Creating a tool wall in a shed is a great idea for keeping many tools organized and easy to find when you need them.
Not only will it make it easier to find the tools you need, but it will also help to keep your shed neat and tidy. With a little bit of planning and the right materials, you can create a tool wall that will make your shed a more efficient and organized workspace.
Posted: March 7, 2023